
I was invited by the Santa Clara Valley Watercolor Society a few weeks ago to do an hour’s watercolor demonstration at their annual show and reception. The general directive they gave me was to show “wet-into-wet” technique—something aspiring watercolor painters are likely to learn on their first day in art class.
I vacillated and dilly-dallied for weeks about what to do for this demo, and while most of the things that came to mind would have been okay—that is, they could have given people information of some reasonable value—I really couldn’t get into them.
Then I visited the astonishing—No! Not astonishing. STUPEFYING!—show of French Impressionist Claude Monet’s late work that recently ran at the DeYoung Museum in San Francisco. All the work in the show was done at his home and garden at Giverny. I eventually wandered into the large gallery that held those huge wall-sized water lily paintings, and (after I recovered from that first supreme “wow” moment) I thought…YESSSSS!! I KNOW NOW WHAT I HAVE TO DO. EVEN IF IT IS TOTALLY OUTRAGEOUS, PRESUMPTUOUS, AND CRAZY, AND EVEN IF I MAKE A COMPLETE FLOP OF IT! But I was so excited by it I simply couldn’t consider anything else. My demo would be an attempt to create a Monet-esque water lily painting in watercolor! (And what could be wetter wet-into-wet?)
I am not Monet. And Monet was not a watercolorist. So I wasn’t going to attempt to copy his painting, but instead I would paint the garden as he might see it if he were to do it today (I used contemporary photos for reference), and from much the same perspective as he did (just looking into the pond, no “landmarks”, no horizon). I also researched the palette of colors he was using at that time, and I used that palette, or as close to it as I could get with the colors in my own palette. (I’ll list the palette colors and my equivalents below).
With only an hour for the demo, I had to explain to the audience up front that what they were going to see was mostly me splashing water and paint around on the huge piece of watercolor paper I brought to paint on (48″ x 32″). The painting would be nothing close to finished. But it WOULD be very wet. Wet-into-wet-into-wet-into-MORE-wet (the original focus, of course, for the demo!) And it would have the foundation of a water lily painting.
In my studio prior to the demo, I penciled in the water lilies and put in a little bit of color. I did this ahead of time because I didn’t want to waste precious demo minutes drawing and waiting for that pinkish paint to dry.
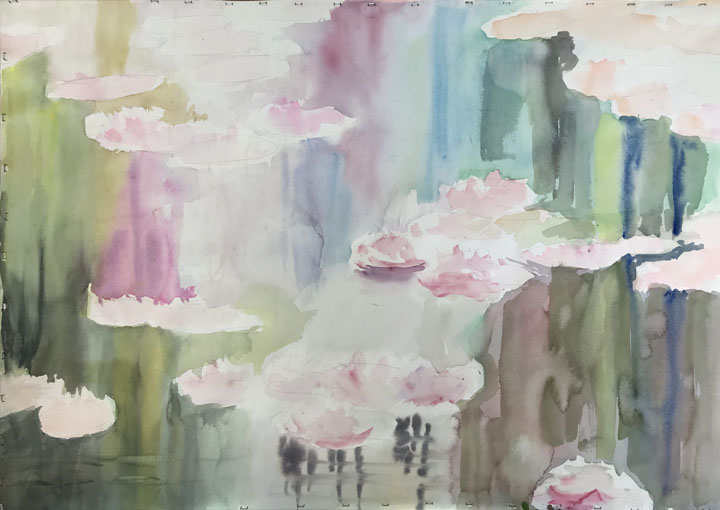
Below you see what it looked like when the hour’s demo time was over. Not much going for it, but it has the basic areas mapped out, with the right and left sides somewhat more developed than the center area.
So then I took it back to the studio, and I worked the middle section a bit more so that the layer had a fairly consistent degree of coverage overall. At that point, this is how it looked. It’s important to note that in this style of watercolor painting, each layer needs to dry thoroughly before the next layer is applied.
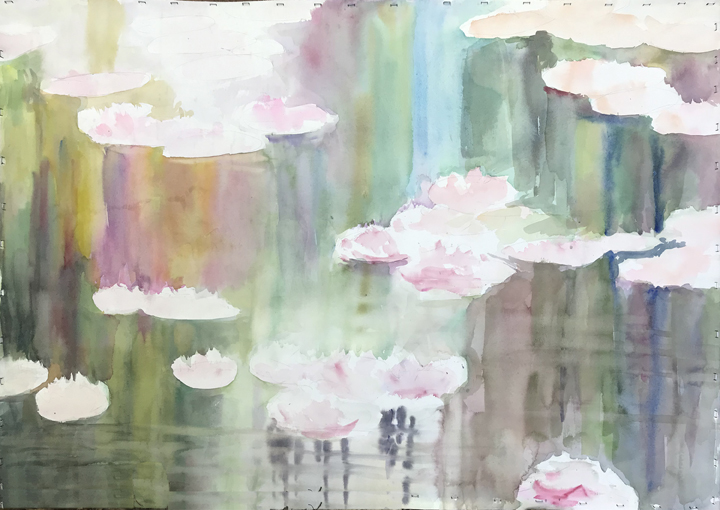
In the second layer, I started to develop more intensity of color. The entire water area contains nothing but reflections of the colorful plants, trees, and flowers that surround it, with a little bit of light color and some dark, skinny lines at the bottom that are reflections of a few trees against a pale sky. It is always easy for me to get overly crazy with brilliant color, and a couple of times I caught myself starting to close in on that sky area where I really didn’t want to, and I had to kleenex away some of that paint to keep that area open.
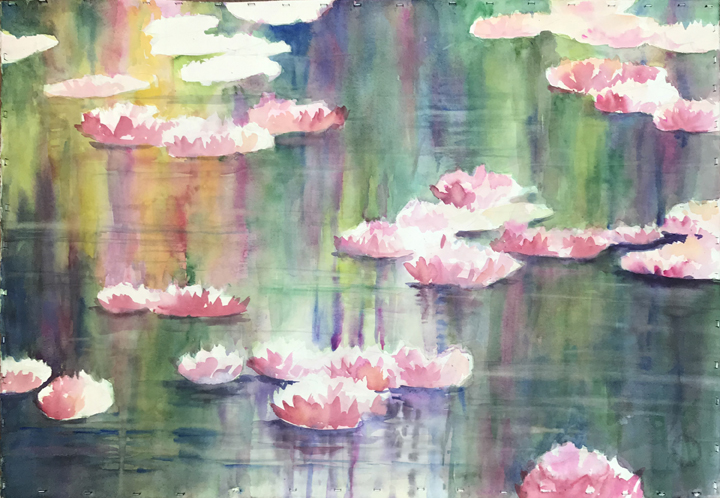
In this layer I also started messing around a little with some ripple effects. When the second layer was complete, this is how the painting looked.
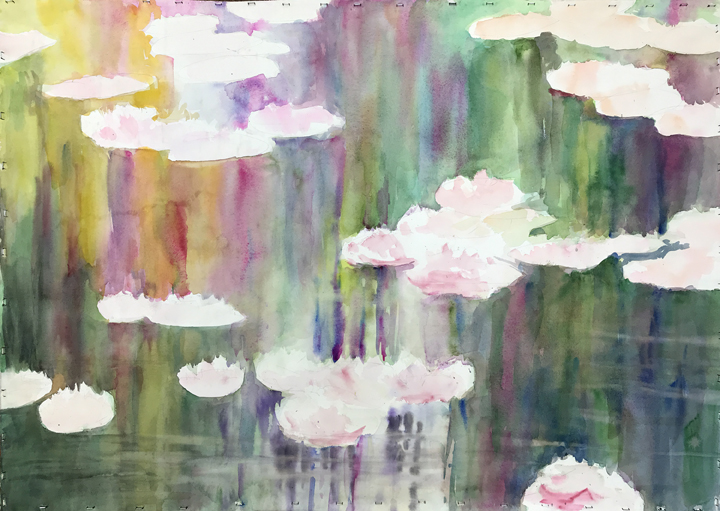
In the third layer, I continued to deepen the color on the two sides and top, and I began to fill in some of the water lilies that are sitting on top of the water. Some of the ripples went away as I did this, but then I started adding them in again, this time in earnest, mostly by lifting color up with a large damp brush, and for some, going back in with wet color, laying it down in a horizontal streak, moving the brush pretty quickly across the paper with some significant pressure, then sopping some of it up in random-ish spots, and letting a little spread out around the edges so that it might start developing a little bit of “blooming”. (As watercolorists, we have a love-hate relationship with blooms, blossoms, cauliflowers, watermarks, or whatever you want to call them. I don’t panic when I see one happening unintentionally. Lots of times they can work to enhance the piece, and in the very worst case, when they happen and you hate them, they can usually be remedied by applying another thin layer of something once everything has dried completely.)
I actually had to go back and open up a little bit of that open sky reflection area at the bottom; it had filled in a little more than I had wanted. I did this by lifting out some of the color at the outer parts of that light-colored area.
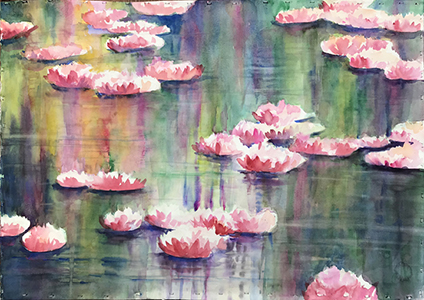
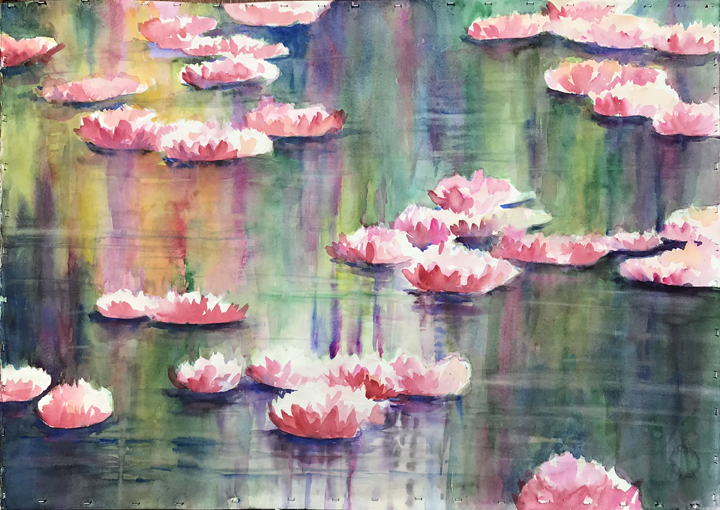
To finish the painting I needed to develop the water lilies, adding lots of permanent rose, alizarin crimson, and cadmium orange to create the bunches of floating flowers, and then to place some strong, dark ultramarine blue areas directly under the blooms, with hard edges right next to the flowers and softer edges moving away from them. While these blue areas were wet, I dropped alizarin crimson into the wet blue blobs—that is to say, I collected a little aliz on a small wet brush and just touched it into the wet blue color. When color is dropped in in this way, it will sort of move around as it dries and produce delicious, “watercolory” effects, in this case with subtle mixes of blue and purple. This placement of dark, shadowy color areas under the flowers has the effect of letting them sit and float atop the surface of the water, and makes clear that they are real objects, not reflections.
MONET’S PALETTE
Here’s Monet’s palette (left) and my equivalents. Remember that he was painting in oil.
Flake white = White paper
Cadmium yellow = Cadmium yellow
Vermilion = Cadmium red
Cadmium orange = Cadmium orange
Deep madder = Alizarin crimson
Cobalt blue = Cobalt blue
Ultramarine blue = Ultramarine blue
Emerald green = Sap green
Hooker’s green
Viridian green = Hooker’s green
Manganese blue
I also went to DeYoung Museum to see his exposition. Monet was a genius. One of kind.
thanks for viewing my page, and it’s nice to hear from a fellow Monet fan!
Great article.
Enjoyed reading your article Karen! My daughter Sara treated me to Paris in 2018. We visited many landmarks & museums. Monet’s house & garden in Giverny and Musée L’Orangerie were the highlight of our trip!!
I would like to try to paint some water lilies in watercolors. I painted my version of water lilies in acrylic and it turned out great!
Creativity yours,
Pauline 🪷
Thanks again!